

Installing a rail transfer trolley is a crucial process that requires careful planning, precise execution, and adherence to safety standards. As a seasoned rail transfer trolley supplier, I've witnessed firsthand the transformative impact these trolleys can have on industrial operations. In this comprehensive guide, I'll walk you through the step-by-step process of installing a rail transfer trolley, sharing valuable insights and tips along the way.
Pre-Installation Preparation
Before you begin the installation process, it's essential to conduct a thorough site assessment to ensure that the location is suitable for the rail transfer trolley. Here are some key factors to consider:

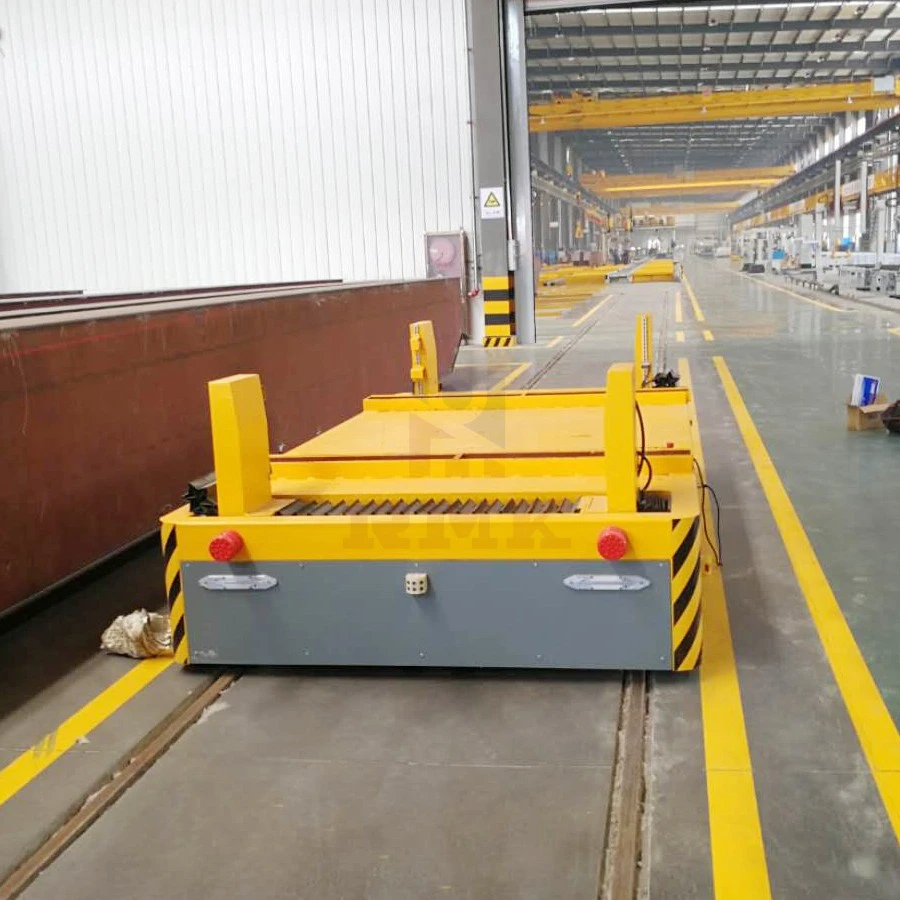
- Surface Condition: The surface where the rails will be installed should be flat, level, and free of any debris or obstacles. Any unevenness or irregularities in the surface can cause the trolley to derail or malfunction, leading to potential safety hazards.
- Load Capacity: Determine the maximum load capacity of the rail transfer trolley and ensure that the installation site can support the weight. This includes considering the weight of the trolley itself, as well as the weight of the materials or equipment it will be transporting.
- Clearance Requirements: Measure the available space around the installation site to ensure that there is sufficient clearance for the trolley to operate safely. This includes considering the height, width, and length of the trolley, as well as any overhead obstacles or structures.
- Electrical Supply: If the rail transfer trolley is electrically powered, ensure that there is a suitable electrical supply available at the installation site. This includes checking the voltage, amperage, and phase requirements of the trolley, as well as the availability of grounding and protection devices.
Once you have completed the site assessment, you can proceed with the following pre-installation tasks:
- Gather the Necessary Tools and Equipment: Depending on the type and size of the rail transfer trolley, you may need a variety of tools and equipment for the installation process. This may include wrenches, screwdrivers, drills, levels, and measuring tapes.
- Review the Installation Manual: Carefully review the installation manual provided by the manufacturer to familiarize yourself with the specific installation requirements and procedures for your rail transfer trolley. Pay close attention to any safety instructions or warnings.
- Prepare the Rails: If the rails are not pre-cut or pre-drilled, you will need to cut and drill them to the appropriate length and size. Ensure that the rails are straight and level, and that the holes are properly aligned.
- Mark the Installation Location: Use a chalk line or tape measure to mark the location where the rails will be installed. This will help ensure that the rails are installed in the correct position and alignment.
Rail Installation
The next step in the installation process is to install the rails. Here are the general steps involved:
- Lay the Rails: Begin by laying the rails on the prepared surface, ensuring that they are straight and parallel to each other. Use a level to check the alignment and adjust as necessary.
- Secure the Rails: Once the rails are in place, secure them to the surface using the appropriate fasteners. This may include bolts, screws, or welding, depending on the type of surface and the requirements of the rail transfer trolley.
- Connect the Rails: If the rails are not continuous, you will need to connect them using rail joints. Ensure that the joints are properly aligned and tightened to prevent any movement or separation.
- Check the Rail Alignment: After the rails are installed, use a level and a straightedge to check the alignment and ensure that the rails are level and parallel. Make any necessary adjustments to ensure smooth operation of the rail transfer trolley.
Trolley Installation
Once the rails are installed, you can proceed with the installation of the rail transfer trolley. Here are the general steps involved:
- Position the Trolley: Carefully position the rail transfer trolley on the installed rails, ensuring that the wheels are properly aligned with the rails. Use a crane or forklift to lift and position the trolley if necessary.
- Connect the Electrical Wiring: If the rail transfer trolley is electrically powered, connect the electrical wiring according to the manufacturer's instructions. Ensure that all connections are secure and properly insulated to prevent any electrical hazards.
- Install the Control System: Install the control system for the rail transfer trolley, including the control panel, switches, and sensors. Ensure that the control system is properly wired and configured to operate the trolley safely and efficiently.
- Test the Trolley: Once the trolley is installed and the electrical wiring is connected, conduct a thorough test to ensure that the trolley operates smoothly and safely. This may include testing the movement, speed, and braking system of the trolley.
Safety Considerations
Safety is of utmost importance when installing a rail transfer trolley. Here are some key safety considerations to keep in mind:
- Follow the Manufacturer's Instructions: Always follow the installation instructions and safety guidelines provided by the manufacturer. This will help ensure that the rail transfer trolley is installed correctly and operates safely.
- Wear Appropriate Safety Gear: When working with the rail transfer trolley and the installation equipment, wear appropriate safety gear, such as safety glasses, gloves, and hard hats. This will help protect you from any potential hazards.
- Use Caution When Lifting and Moving the Trolley: If you need to lift or move the rail transfer trolley, use caution and follow the proper lifting techniques. Use a crane or forklift if necessary, and ensure that the trolley is properly secured to prevent any accidents or injuries.
- Test the Trolley Before Use: Before using the rail transfer trolley, conduct a thorough test to ensure that it operates smoothly and safely. This may include testing the movement, speed, and braking system of the trolley.
- Train the Operators: Ensure that all operators of the rail transfer trolley are properly trained and qualified to operate the equipment safely. Provide them with the necessary training and instructions on how to operate the trolley, as well as any safety procedures or guidelines.
Conclusion
Installing a rail transfer trolley is a complex process that requires careful planning, precise execution, and adherence to safety standards. By following the steps outlined in this guide, you can ensure that your rail transfer trolley is installed correctly and operates safely and efficiently. If you have any questions or need further assistance, please don't hesitate to contact us. We are a leading Industrial Rail Transfer Trolley supplier, offering a wide range of high-quality rail transfer trolleys, including the 15T Cross Rail Transfer Trolley and the High - Temperature Rail Transfer Cart. Whether you're looking to improve your material handling efficiency or enhance your industrial operations, we have the solutions you need. Contact us today to learn more about our products and services, and to discuss your specific requirements. We look forward to working with you!
References
- Manufacturer's Installation Manuals
- Industry Standards and Guidelines for Rail Transfer Trolley Installation


